Showing posts with label crafty. Show all posts

29 January 2018

How to Make Doll Diapers | DIY | Sewing

Hey guys! I know this is my second diaper themed project in a row, but I couldn't pass this project up! CJ has started mimicking EVERYTHING we do with Baby E. When we feed the baby, CJ feeds her babies. When we change a diaper, she has to change one too. She was playing with some newborn sized disposables, but the other day she asked me for "pretty diapers" for her doll, so I had to make them. It ended up being WAY easier than I anticipated, but you do need basic sewing skills for this project.

22 January 2018

How to Replace Cloth Diaper Elastics

Hey guys! Today I'm going to show you something that's pretty simple to do, but will save you a ton of money. We use cloth diapers on both CJ & Baby E, and most of our diapers have been around since CJ first started in them almost 2 years ago. We primarily use BumGenius Freetimes and they hold up amazingly and they really never let us down. The only thing that needs a little refresher once in a while is the elastics can loose their elastic-ness over time.

15 January 2018

I'm back!

Hi! I'm back! I haven't posted here since March of 2014 and a LOT has changed since then. To start with, that hellish year of deployment ended!

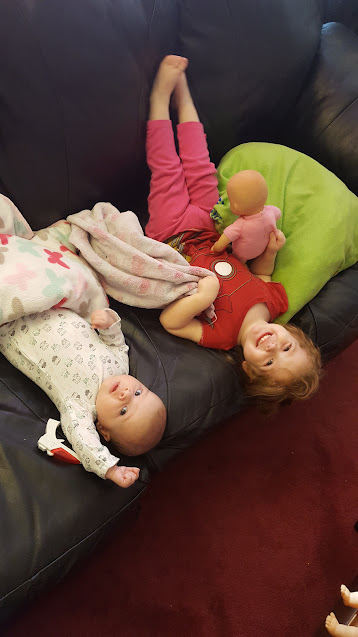
In the last 4 (!!!) years, the husband and I have moved to a nice little suburb in our home state of Pennsylvania and had two children. Our older daughter is 2 year old CJ, who loves French fries, coloring and the Magic School Bus. The younger is Baby E, who is currently 2 months old and loves being held, her pacifier and waking up at 4 am. I'm now a stay at home mom & spend my day trying to raise smart, kind humans.

I still love crafting and creating, and spend most naptimes working on projects for us & to sell on my newly refreshed etsy page. I haven't shared my projects anywhere in quite a while, so I'm looking forward to having a place to do that again. I've got a few ideas in mind for projects I want to do, so you'll be (hopefully!) seeing them shortly.

Reading is still something I love, but have less time to do these days. That being said, there will still be book reviews posted on the occasion I actually finish a book. I'm hoping to hit 20 books in 2018, so let's see how that goes!

In addition to those three main topics, I also hope to just have some general blog type stuff, reviews, and whatever else strikes. I hope you stick around for the ride :)

-Jenn

07 March 2014

Turn a Tee into a Throw Pillow!

Hey guys! So I have another tee project for you guys today. This one was actually a request I got a few weeks ago, on how to turn a tee into a pillow. Well, I had been holding off on it because I didn’t have a shirt to use and I hadn’t had a chance to get to a thrift store to find one, but then I got a shirt in the mail from Taco Bell? I don’t remember ordering it, but maybe I did. Either way, thanks, Taco Bell!

Besides the shirt, I used a sewing machine, a 16”x16” pillow form and some velcro. You can hand sew or use gluing options here, and you can also substitute snaps for the velcro or just choose to have it not open at the back if you don’t mind not being able to wash it.
IMG_5021

21 February 2014

How to Make a Pokeball Perler Bead Necklace

how to pokeball perler beads thumb

Hey guys! Today I want to show you how to do a project that is great for any nerdy crafters. I’m going to show you how to use perler beads to make an 8-bit necklace! This translates really well into most video games and cartoon characters because they convert so nicely into 8-bit, if they aren’t already.
For this project, I’m going to be making a Pokeball necklace, but these simple steps will give you what you need to do any perler beading and there are a TON of patterns online if you don’t think you can come up with your own.

06 February 2014

DIY Magazine Storage & Organization

Hey guys! I’ve got a new organization DIY for you this week.


This is a great upcycled or recycled project from a cereal box. I used a family size box of Lucky Charms because I’m a high functioning adult who eats a nutritious breakfast on a daily basis, but you can use whatever you’ve got around.

23 January 2014

How To Make a T-Shirt Quilt


Hey guys! Do you have a huge stack of t-shirts that you don’t wear? We all do- shirts we got for free from various places, band tees, fandom tees, shirts you’ve outgrown but are too nostalgic to get rid of- they’re everywhere. Well, here’s something to do with them: turn them into a quilt!

09 January 2014

Dressing Up Bobby pins

Hello! For those of you who know me or who watch my videos, you already know that I really love wearing bows and things like that in my hair, and I often pin the front of my hair back, and then cover the pins with a bow.

Well, lately, I’ve been finding that I’ve been lazy. I can’t be bothered to dig through my bows to find one that matches, or I honestly just forget. But, I still like wearing my hair pinned back, so I decided maybe I should just fancy up some of the hundreds of bobby pins that inevitably end up filling my dresser and bathroom.
clip_image002

02 January 2014

positivity & goal achieving diy projects

Happy 2014! I know that whether or not people make new years resolutions is kind of a controversial topic; some people love them, some people hate them. Of course we don't need to wait until the calendar changes to make good and positive changes into our lives, but on the other hand, we all know that thing we do where we're scrolling through tumblr and we're like "okay, at 2:00 I'll start my homework," and then when it's 2:07 we have to wait until 2:30, so it kind of makes sense that we'd also want to start our life changes on a nice round date.

As for me, I don't usually make big resolutions at the new year, but I do tend to set goals for myself to achieve throughout the year. I talked about it in a video here, but these are my goals:

1. Read 100 books
2. Drink more water
3. Take more pictures & learn how to actually use my DSLR
4. Continue to work towards managing my anxiety.

In order to achieve those goals, I have two DIY projects that I did to help direct my motivation & set myself up for positivity.

The first is a Vision Board. Like you can see in the video, my vision board is basically a collage of people I find to be inspirational, quotes and pictures that cheer me up and images of goals I want to achieve. Mine features Demi Lovato, Tina Fey & Amy Pohler, as well as quotes reminding me to chill out, keep calm and to live without regrets. It also has some pictures reminding me I want to read & take pictures so that I don't forget about that. I plan to keep my vision board above my desk, so that I can see it and stay motivated throughout the year.

The second is a Good Things Jar. This is an empty salsa jar that I decorated and plan to fill with slips of paper with "good things" on them as they happen. My goal is that, at the end of the year- or when I have a day where it seems like absolutely nothing is good- I can pull my good things jar out and read through them. I think that this will be a cool tradition to look back on at the end of the year.

Both of these projects will hopefully keep me on the path of positivity this year, which is my biggest goal for 2014. Do you make resolutions or goals at the beginning of the year? What are they?


20 December 2013

Christmas Ornament Earrings

clip_image002Hey guys! I have another Christmas DIY for you this week, but this time it’s to dress you up, not your tree. I’m going to show you how to make some festive earrings using the mini ornaments that you can find everywhere these days, including the One Spot (read: dollar bin) at Target.


For the project you need two of those ornaments (the dollar ones from Target come in a package of 16), some jump rings and some earring hooks. I’m also going to show you an alternate way to do these if you like your earrings to dangle more, and for those you’ll also need some jewelry chain.

clip_image004
First, let’s do the shorter ones. No additional dangle on this pair, for those of you who like your earrings a bit more modest- or if you’re like me and into the asymmetrical look, this is just the shorter of the set!

I hope you’re ready for how unbelievably easy this is:
clip_image006
Step one: Open up your jump ring, using two pairs of pliers.
clip_image008
Step two: put both the ornament and the hook on the jump ring.
clip_image010
Step three: close the jump ring back up.

Yes, that’s really all there is to it. If you like your earrings short, go ahead and do that same thing again, but if you want a longer one, let’s keep going.
clip_image012
For the longer one , it’s almost exactly the same, with the addition of some jewelry chain.

clip_image014
Step one: cut the chain to the length you want it to be.
clip_image016
Step two: open up your first jump ring.
clip_image018
Step three: put one end of the chain, and the ornament on that jump ring, and close it.
clip_image020
Step four: put the other end of the chain and the earring hook on a second jump ring. Close that one, too.

Yup. That’s really how easy it is!

Like I said, I’m into the asymmetrical look so I’m wearing one of each, but you can go ahead and do whichever you prefer! If you do these, I’d love to see them- send them to me on twitter or instagram, I’m @techni_moments!

Stay crafty,


13 December 2013

Hot Glue Snowflake Ornaments

Hey guys! I hope that it’s not too early for Christmas for you guys. I’ve been in holiday mode since Halloween ended, but I figure it’s December now, I can start sharing the holiday love! This week I’m going to show you how to do a really super easy ornament or decoration using nothing but hot glue and some glitter!

clip_image002There’s no sewing or really much else required for this, so it’s pretty quick, too. You can definitely do this with older children, but use judgment- hot glue gets hot.When you’re finished this project, you’ll have a glittery, icy snowflake that’s perfect for hanging on your tree, putting in a window or anywhere else that needs some winter love.

clip_image004
All you need for this is hot glue & glitter, but I’d also recommend some wax paper and then whatever you’re going to hang it with- wire, ribbon, etc. You’re going to need a few hot glue sticks. Mine took about 4. As for the wax paper, it’ll make pulling the hot glue up much easier than regular paper would.

Lay out your wax paper, and draw an asterisk the size you want your snowflake to be.
You could also put a printed out snowflake under the paper and trace it, but I’m going to freehand mine- I just wanted a bit of a guide.


clip_image006Start by tracing the asterisk with the glue. You want it to be pretty thick, so don’t go too light on it. Also, don’t worry about getting those pesky little strings of glue just now, you can deal with those once the whole thing is done. There will be a ton of them by the end.


clip_image008Once the basic shape is done, add in details. I put circles at the end of each line and also put some arrowheads on the lines to make it look a little more snowflakey, but you can look at pictures and do pretty much whatever you want here.
Then, you need to let it dry. Hot glue dries pretty quickly, but still let the whole thing sit for a couple of minutes before doing the second layer.
You don’t want to be remelting the same not-quite-cooled glue because then it won’t get any thicker.


clip_image010Once it’s dry, add a second layer to everything you’ve done. Determine where the top is going to be, and make sure you’ve left a loop or something to run the wire or ribbon through. I just didn’t fill in one of the circles on the top of mine, but depending on how you do yours you may need to get a bit creative with it.


clip_image012
Before it has a chance to dry completely, cover it in glitter. Just cover it. Glitter. Everywhere. Then, do a third and final layer of glue. Let that final layer dry for at least 5-10 minutes before you do anything with it.


clip_image014After a sufficient amount of time has passed, go on and peel it off of the paper. If you used wax paper, it shouldn’t stick too badly, but either way, pick off any paper that is stuck to it, and also cut off all of those little hot glue strands that always seem to be everywhere.


clip_image016Add some wire or ribbon to hang with, and you’re done! It’s ready to be hung on your tree, or wherever else you’re decorating this holiday season. And the best part is, it’s not even really a Christmas decoration so it can stay up all winter!


If you do one of these, I’d love to see it- send me a pic on twitter or instagram, @techni_moments. Good luck!

Stay crafty!


19 September 2013

Rainbow Rowell's 'Fangirl' Inspired Book Earrings

Hey guys! Today I have a craft project for you that is partially inspired by Karen Kavett’s DIY Book Necklace video on the Wonderly Channel, and also partially by my desire to do something to show my love for Rainbow Rowell’s Fangirl. Fangirl was just SO GOOD that when I finished it, all I could think about was doing a craft inspired by it so other people would know they could talk to me about it.

clip_image002I played around with a few ideas, but kept coming back to Karen’s adorable necklace. So I decided to try her technique for a pair of earrings. Karen's original necklace was much more involved- actually binding together pages and so on, which turned out BEAUTIFUL, but this is a much simpler version.


clip_image004
For the majority of the book, I used old business cards because I just ordered new ones and am trying to work through my old ones. If you don’t have any business cards to use, I’d recommend cardstock or any other heavyweight paper, but not as heavy as cardboard.

Other than that, you’re going to need earring wire, jump rings, some basic craft tools (pliers, ruler, X-acto knife, glue stick & hot glue gun) and a printed out, scale copy of the book cover you want to use.


clip_image008
My first step was to cut my pages out of business cards. I measured my mini book cover and came up with 1.75 cm x 2.25 cm, but yours may vary, so double check before you start cutting. I cut out 10 for each earring- again, based on the size of the spine on my cover, so play around with it.


clip_image010
Step two is to put the cover together. Cut out a tiny scale replica of the full dust jacket, including the inside flaps. I actually had to scan and piece together my cover, but there are tons online if you are doing a different book. Using your regular glue stick, glue the cover to another business card and cut it out.

(Don’t forget you’re going to need two of these if you’re making earrings)


clip_image012
Flip that over, and score on the back where your folds should be to make it easier to construct. Then, press your folds and use the side of a pencil or a spoon to really make the folds crisp.


Once your cover is all folded up and looks how you want it to, you can put that aside and turn your attention back to the pages.


clip_image014
Since my book is going to be so small, I wasn’t concerned about it being open and being able to see pages. I took my glue stick and just made a stack of my little cut out pages.  This was probably the most time consuming part of the whole project, but it didn’t take me more than 10 minutes to glue together two tiny stacks of pages. Set those aside to dry thoroughly.

clip_image016


While you’re waiting, use the tip of an X-acto knife to poke a hole near the top of the spine where you want your earrings to dangle from, and then use pliers to insert a jump ring. By the time both are done, your pages should be dry.


clip_image018
To insert the pages into the book, start by hot gluing the little stack directly to the inside spine/middle of the cover. Hold the pages upright for a few seconds to let them set. Then do the front and back, one at a time pressing and holding before moving on. Let that dry completely cool before adding the earring wire to the jump rings.


clip_image020
Once you’ve got the earring wire on, you’re done! You could, instead of the earring wire, also just slip it onto a necklace chain, put it on a keyring, make a ton of them and hang them from a bookshelf… Oh man, so many ideas for this project!


I wanna know- what book would you be most likely to wear as an accessory? Let me know here, or on twitter @techni_moments! And, as always, if you do this project, I wanna see it!  

Good luck, &stay crafty :)


PS: Video tutorial is here, if you’d prefer!


09 September 2013

How to Make a DIY Memo Board

clip_image002
Hey guys! This week I’m going to show you a quick & easy DIY that will help you dress up your room or dorm & also keep you organized with all of this back to school newness going on. Like I mentioned in a video you may have seen if you’re subscribed to my channel, organization is the most important part of getting back to school, and this is another way to do that.

I love these memo boards because you can stick anything on them; they can be decorative, or useful or a mixture of both depending on what you put on them. Plus, you can change it out easily, so you don’t have to commit to anything long term.
 
clip_image004You’re going to need a piece of cardboard cut to the size that you want your finished project to be. I cut a piece out of a box that I got in the mail recently. You’ll also need the fabric you want to use, some fleece or batting, ribbon, buttons and a hot glue gun & glue sticks.


clip_image006

The first thing that you’ll need to do is lay the cardboard on the fleece and wrap the sides up. Glue them down using the hot glue gun. Make sure that you’re pulling tightly so that the fabric in the front isn’t loose or sagging.

You’ll want to work quickly and in small bits, putting down glue and then putting down fabric. Hot glue dries really quickly & is also REALLY HOT, so please be careful.


clip_image008Once that’s done, you’re going to do the exact same thing with the fabric. I highly recommend using a fun or funky fabric in this project, because then it can be a conversation piece, or show off your personal style. For my craft room memo board, I picked a fabric with crafty pieces all over it.


clip_image010
Again, when you’re doing this you want to be sure you keep the fabric pulled tight! To get the corners to lay flat, after you’ve done all the sides, open the corners up and flatten them open before gluing them down.


You now have a fabric covered piece of cardboard. Good job. Time to make this usable.
clip_image012

clip_image014I did this by measuring out all of the ribbons before gluing any of them down. I used four in each direction but you can do more or less than that. It really depends on the size of your finished board.


clip_image016
You could flip this all over and glue them down, attempting to keep them all straight, or you can hot glue buttons over every time ribbon crosses. Not only will this make gluing the ribbons easier, but it will also hold all of your memos and things in place when you’re using it. You could substitute other things for buttons, or even just glue the crosses down, but I think the buttons add a nice touch.


Then, go ahead and glue the ends of the ribbons down to the back side. Also, glue ribbon to the back so you can hang this up.

Once that’s finished, you can fill it up with all of your goodies & memorabilia.
clip_image018

You can see how I did mine with a bit more detail right here, and if you make one of these, you should let me see it! Tag me on twitter or instagram @techni_moments.


PS: I also posted a review of the nineteen books I read in August, which you can also check out if you're interested!


01 August 2013

Tie Dye Party!

Chloe & I had a tie dye party this week! And by that, I mean Chloe & I spent two days tie dying by ourselves in the backyard with no one else around. But we had a good time and made some crazy cool stuff.

We dyed a TON- like, 6 shirts, two pairs of shorts, a dress and three yards of fabric, and still had a bit of dye left over. I have a couple pictures under the cut, & also a video which shows off my favorite techniques and also my favorite pieces we dyed.

IMG_2975