20 December 2013

Christmas Ornament Earrings

clip_image002Hey guys! I have another Christmas DIY for you this week, but this time it’s to dress you up, not your tree. I’m going to show you how to make some festive earrings using the mini ornaments that you can find everywhere these days, including the One Spot (read: dollar bin) at Target.


For the project you need two of those ornaments (the dollar ones from Target come in a package of 16), some jump rings and some earring hooks. I’m also going to show you an alternate way to do these if you like your earrings to dangle more, and for those you’ll also need some jewelry chain.

clip_image004
First, let’s do the shorter ones. No additional dangle on this pair, for those of you who like your earrings a bit more modest- or if you’re like me and into the asymmetrical look, this is just the shorter of the set!

I hope you’re ready for how unbelievably easy this is:
clip_image006
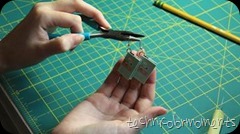
Step one: Open up your jump ring, using two pairs of pliers.
clip_image008
Step two: put both the ornament and the hook on the jump ring.
clip_image010
Step three: close the jump ring back up.

Yes, that’s really all there is to it. If you like your earrings short, go ahead and do that same thing again, but if you want a longer one, let’s keep going.
clip_image012
For the longer one , it’s almost exactly the same, with the addition of some jewelry chain.

clip_image014
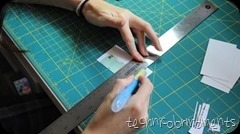
Step one: cut the chain to the length you want it to be.
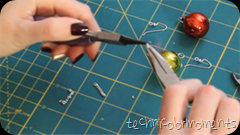
clip_image016
Step two: open up your first jump ring.
clip_image018
Step three: put one end of the chain, and the ornament on that jump ring, and close it.
clip_image020
Step four: put the other end of the chain and the earring hook on a second jump ring. Close that one, too.

Yup. That’s really how easy it is!

Like I said, I’m into the asymmetrical look so I’m wearing one of each, but you can go ahead and do whichever you prefer! If you do these, I’d love to see them- send them to me on twitter or instagram, I’m @techni_moments!

Stay crafty,


13 December 2013

Hot Glue Snowflake Ornaments

Hey guys! I hope that it’s not too early for Christmas for you guys. I’ve been in holiday mode since Halloween ended, but I figure it’s December now, I can start sharing the holiday love! This week I’m going to show you how to do a really super easy ornament or decoration using nothing but hot glue and some glitter!

clip_image002There’s no sewing or really much else required for this, so it’s pretty quick, too. You can definitely do this with older children, but use judgment- hot glue gets hot.When you’re finished this project, you’ll have a glittery, icy snowflake that’s perfect for hanging on your tree, putting in a window or anywhere else that needs some winter love.

clip_image004
All you need for this is hot glue & glitter, but I’d also recommend some wax paper and then whatever you’re going to hang it with- wire, ribbon, etc. You’re going to need a few hot glue sticks. Mine took about 4. As for the wax paper, it’ll make pulling the hot glue up much easier than regular paper would.

Lay out your wax paper, and draw an asterisk the size you want your snowflake to be.
You could also put a printed out snowflake under the paper and trace it, but I’m going to freehand mine- I just wanted a bit of a guide.


clip_image006Start by tracing the asterisk with the glue. You want it to be pretty thick, so don’t go too light on it. Also, don’t worry about getting those pesky little strings of glue just now, you can deal with those once the whole thing is done. There will be a ton of them by the end.


clip_image008Once the basic shape is done, add in details. I put circles at the end of each line and also put some arrowheads on the lines to make it look a little more snowflakey, but you can look at pictures and do pretty much whatever you want here.
Then, you need to let it dry. Hot glue dries pretty quickly, but still let the whole thing sit for a couple of minutes before doing the second layer.
You don’t want to be remelting the same not-quite-cooled glue because then it won’t get any thicker.


clip_image010Once it’s dry, add a second layer to everything you’ve done. Determine where the top is going to be, and make sure you’ve left a loop or something to run the wire or ribbon through. I just didn’t fill in one of the circles on the top of mine, but depending on how you do yours you may need to get a bit creative with it.


clip_image012
Before it has a chance to dry completely, cover it in glitter. Just cover it. Glitter. Everywhere. Then, do a third and final layer of glue. Let that final layer dry for at least 5-10 minutes before you do anything with it.


clip_image014After a sufficient amount of time has passed, go on and peel it off of the paper. If you used wax paper, it shouldn’t stick too badly, but either way, pick off any paper that is stuck to it, and also cut off all of those little hot glue strands that always seem to be everywhere.


clip_image016Add some wire or ribbon to hang with, and you’re done! It’s ready to be hung on your tree, or wherever else you’re decorating this holiday season. And the best part is, it’s not even really a Christmas decoration so it can stay up all winter!


If you do one of these, I’d love to see it- send me a pic on twitter or instagram, @techni_moments. Good luck!

Stay crafty!


06 December 2013

Influenster #VioletVoxBox

Hey guys! It’s been a really long time since I’ve done a post like this- I don’t think I’ve gotten a box from Influenster since I was still living in Charleston. I was super excited to get another one.
IMG_4403
If you want to see me opening it, you can check out the video on my youtube channel, here! Otherwise, here’s what’s in it:

28 November 2013

How To Add Elbow Patches to a Sweatshirt

Hey guys! It’s officially that time of year when I need to wear way more layers than I like to. I am literally always cold, so once it gets to be around the holidays, you can often find me in 4 or 5 layers, even just in the house. The worst part about this is how dull and unflattering that top layer can often get. And honestly, I can’t really help you turn a sweatshirt that needs to be over 4 other layers into something flattering, but I can make it cute.

clip_image002I’m going to show you how to take a thrifted sweatshirt, some fusible webbing, and one felt square and turn it into a cute sweatshirt with adorable elbow patches. There are both no-sew and hand sewing options for this, and I’m absolutely in love with it.


Like I said- you need an oversized sweatshirt, I got mine for about $2 at a local thrift store. You’ll also need a felt square which shouldn’t be more than 50 cents, and some fusible webbing which is about $3/yard, but you don’t need a whole yard for this. You want to look for something called Heat and Bond (or similar, there are a couple of them out there). Basically it’s a paper backed, double sided fusible interfacing.
You also want to finish it off- I used some embroidery thread and a needle, but you can also use a 3D or puffy paint.


clip_image004So the first step is to put on your shirt and mark exactly where you want your patch to be. I put a straight pin just above and just below my elbow. My patch ended up being a bit bigger than that, which is totally fine! I just wanted to know where to line it up.

Also, you’ll want to do this on both arms- don’t try to do one and then line up the other because it might be off a bit, and you want to make sure that the sleeve isn’t twisted weird.

clip_image006Take your felt square and iron it to one side of your fusible web. Iron both sides so that it is securely attached, then cut the square out completely. Set aside the rest of the web because it’s not gonna go bad- save it for another sweatshirt or another project.


clip_image008On the paper side of the felt/webbing combo, draw or trace whatever you want on your elbows! I did hearts because I wanted something cute and girly, but you can do anything you want. You can go traditional with ovals or rectangles, or show off your team spirit with footballs in your team color- the possibilities are endless.

Again, you want these to be pretty similar, so trace them both from a template, or cut out one and then trace the other from that.


clip_image012Don’t forget to peel off the paper backing! When you peel the paper off of the back of your heart, you now have basically made your own DIY iron on patch. Line up the patch with where your original straight pins marked and iron it on.


clip_image014

The felt is kind of thick, so you should use a decently high temperature on your iron, and also you might even want to let the iron sit on the patch for 10-15 seconds. Just be really careful not to burn yourself or anything else.


clip_image016You can technically stop here, but I’d definitely recommend finishing off the edges either by stitching like I did above, or by using a thin line of puff paint all the way around. If you go the paint route, make sure that you catch both the felt and the shirt in the line of paint and let it dry completely before you wear it. If you go with the stitching method, don’t sew the arm closed.

And, that’s pretty much all there is to it!


This whole project ended up costing me less than $5, and is now honestly one of my cutest top-layer shirts, so I highly recommend giving this a go. If you don’t live in a super cold climate, you could even do this on a thinner long sleeve tee. (Also, I’m jealous, can I come stay with you?)

If you do this project, I’d love to see how it turns out! Send me a picture on twitter or instgram- @techni_moments so I can see!

Stay Crafty!
Jenn

PS: there’s a video tutorial on this right here if you prefer that kind of thing.


25 November 2013

Whee Make It 3D Printer Rental

Hey guys! Yes, it’s been a while. I know. I’m sorry. Let’s move on.

Last week, I was offered a really awesome opportunity from Whee Make It, a company that is currently getting ready to start renting out 3D printers to those of us who love them and want them but can’t quite afford to own one. They asked if I was interested in helping to test out the rental process in exchange for a free (+security deposit) rental, and of course of course I was.

SO, last Saturday, I went to the Whee Make It office in Virginia Beach and picked up a Solidoodle 3 3D printer. I had this idea in my head that I would just download a whole bunch of awesome things from thingiverse, set it to print & finish off the week with a ton of really awesome stuff, and that… sort of happened. As it turns out, 3D printing is a skill that takes some practice, some trial and error and a LOT of patience.

IMG_4194But, after a few false starts (which you can see in the video here) I finally printed some really cool stuff.
IMG_4195You can, again, see almost everything I printed in that video, but two of my favorites are here, a Deathly Hallows pendant that spins in the center, and a chubby little ampersand to sit on my bookshelf.


IMG_4196I also printed a couple of 8 bit heart keychains, and I’m giving away two of them over on my youtube channel. If you’re interested, just head over & subscribe, and then leave me a comment telling me what you would print if you could print absolutely anything. Anyone can enter regardless of location, but please be over 18 or have parents permission so that you can give me your address to mail to you!

Whee Make It will be opening up both printer rentals & 3D printing classes after the new year, so check out their website & also you can visit their facebook page for updates as well. I will definitely be renting from them again in the future in addition to taking a class or two, so maybe I’ll see you there!

stay crafty!


08 October 2013

[Treasury Tuesday] Halloween Inspiration #2

Hey friends! I'm back with another Halloween themed Treasury Tuesday! This time it's a bit more classy in blacks and whites with just a pop of color. If you like the things you see here, don't forget to head over to the listings to favorite & share them!

Also, before we get onto the items, don't forget that that Technicolor Moments on etsy is having a Halloween sale! Use code TMHALLOWEEN at technicolormoments.com to get 13% off your entire purchase for all of October :)

Okay, here we go:

01 October 2013

[Treasury Tuesday] 10.1 - Halloween #1

In honor of Halloween, I'm going to be sharing some spooky treasuries with you guys this month! (I told you, I'm Buddy the Halloween Elf.)

Here's the first one!

28 September 2013

Halloween Inspiration 2013

I know. It’s still September. I understand. BUT HALLOWEEN IS MY FAVORITE, guys. I’m the Buddy the Elf of Halloween. I’m so ready for costumes and decorations and candy and costumes… Wait. Yeah.

I decided I had waited long enough, so I sat down and came up with my first few bits of Halloween décor for the year. Yeah, I’ll probably add some more stuff as we get closer to the actual holiday, but these are the first few things I’ve done.

This isn’t really a how-to post, but more of just some inspiration for you. I am going to talk a bit about how I did them, but I’m not showing step by steps. (To see a bit more step by step though, you can check out a video here.) I’m going to start with the easiest and work my way down to the hardest.

24 September 2013

[Treasury Tuesday] 9.24: Doctor Who!

Hey guys! It's been a while since I've done one of these, but I've been Treasury happy again lately, so I thought I'd share this one with you!

This one is inspired by both my newest Doctor Who pencil bags (which you can see here) & also by the fact that the 50th Anniversary episode is coming up soon. Here are some of the best Doctor Who inspired crafts that I could find this week.

19 September 2013

Rainbow Rowell's 'Fangirl' Inspired Book Earrings

Hey guys! Today I have a craft project for you that is partially inspired by Karen Kavett’s DIY Book Necklace video on the Wonderly Channel, and also partially by my desire to do something to show my love for Rainbow Rowell’s Fangirl. Fangirl was just SO GOOD that when I finished it, all I could think about was doing a craft inspired by it so other people would know they could talk to me about it.

clip_image002I played around with a few ideas, but kept coming back to Karen’s adorable necklace. So I decided to try her technique for a pair of earrings. Karen's original necklace was much more involved- actually binding together pages and so on, which turned out BEAUTIFUL, but this is a much simpler version.


clip_image004
For the majority of the book, I used old business cards because I just ordered new ones and am trying to work through my old ones. If you don’t have any business cards to use, I’d recommend cardstock or any other heavyweight paper, but not as heavy as cardboard.

Other than that, you’re going to need earring wire, jump rings, some basic craft tools (pliers, ruler, X-acto knife, glue stick & hot glue gun) and a printed out, scale copy of the book cover you want to use.


clip_image008
My first step was to cut my pages out of business cards. I measured my mini book cover and came up with 1.75 cm x 2.25 cm, but yours may vary, so double check before you start cutting. I cut out 10 for each earring- again, based on the size of the spine on my cover, so play around with it.


clip_image010
Step two is to put the cover together. Cut out a tiny scale replica of the full dust jacket, including the inside flaps. I actually had to scan and piece together my cover, but there are tons online if you are doing a different book. Using your regular glue stick, glue the cover to another business card and cut it out.

(Don’t forget you’re going to need two of these if you’re making earrings)


clip_image012
Flip that over, and score on the back where your folds should be to make it easier to construct. Then, press your folds and use the side of a pencil or a spoon to really make the folds crisp.


Once your cover is all folded up and looks how you want it to, you can put that aside and turn your attention back to the pages.


clip_image014
Since my book is going to be so small, I wasn’t concerned about it being open and being able to see pages. I took my glue stick and just made a stack of my little cut out pages.  This was probably the most time consuming part of the whole project, but it didn’t take me more than 10 minutes to glue together two tiny stacks of pages. Set those aside to dry thoroughly.

clip_image016


While you’re waiting, use the tip of an X-acto knife to poke a hole near the top of the spine where you want your earrings to dangle from, and then use pliers to insert a jump ring. By the time both are done, your pages should be dry.


clip_image018
To insert the pages into the book, start by hot gluing the little stack directly to the inside spine/middle of the cover. Hold the pages upright for a few seconds to let them set. Then do the front and back, one at a time pressing and holding before moving on. Let that dry completely cool before adding the earring wire to the jump rings.


clip_image020
Once you’ve got the earring wire on, you’re done! You could, instead of the earring wire, also just slip it onto a necklace chain, put it on a keyring, make a ton of them and hang them from a bookshelf… Oh man, so many ideas for this project!


I wanna know- what book would you be most likely to wear as an accessory? Let me know here, or on twitter @techni_moments! And, as always, if you do this project, I wanna see it!  

Good luck, &stay crafty :)


PS: Video tutorial is here, if you’d prefer!


09 September 2013

How to Make a DIY Memo Board

clip_image002
Hey guys! This week I’m going to show you a quick & easy DIY that will help you dress up your room or dorm & also keep you organized with all of this back to school newness going on. Like I mentioned in a video you may have seen if you’re subscribed to my channel, organization is the most important part of getting back to school, and this is another way to do that.

I love these memo boards because you can stick anything on them; they can be decorative, or useful or a mixture of both depending on what you put on them. Plus, you can change it out easily, so you don’t have to commit to anything long term.
 
clip_image004You’re going to need a piece of cardboard cut to the size that you want your finished project to be. I cut a piece out of a box that I got in the mail recently. You’ll also need the fabric you want to use, some fleece or batting, ribbon, buttons and a hot glue gun & glue sticks.


clip_image006

The first thing that you’ll need to do is lay the cardboard on the fleece and wrap the sides up. Glue them down using the hot glue gun. Make sure that you’re pulling tightly so that the fabric in the front isn’t loose or sagging.

You’ll want to work quickly and in small bits, putting down glue and then putting down fabric. Hot glue dries really quickly & is also REALLY HOT, so please be careful.


clip_image008Once that’s done, you’re going to do the exact same thing with the fabric. I highly recommend using a fun or funky fabric in this project, because then it can be a conversation piece, or show off your personal style. For my craft room memo board, I picked a fabric with crafty pieces all over it.


clip_image010
Again, when you’re doing this you want to be sure you keep the fabric pulled tight! To get the corners to lay flat, after you’ve done all the sides, open the corners up and flatten them open before gluing them down.


You now have a fabric covered piece of cardboard. Good job. Time to make this usable.
clip_image012

clip_image014I did this by measuring out all of the ribbons before gluing any of them down. I used four in each direction but you can do more or less than that. It really depends on the size of your finished board.


clip_image016
You could flip this all over and glue them down, attempting to keep them all straight, or you can hot glue buttons over every time ribbon crosses. Not only will this make gluing the ribbons easier, but it will also hold all of your memos and things in place when you’re using it. You could substitute other things for buttons, or even just glue the crosses down, but I think the buttons add a nice touch.


Then, go ahead and glue the ends of the ribbons down to the back side. Also, glue ribbon to the back so you can hang this up.

Once that’s finished, you can fill it up with all of your goodies & memorabilia.
clip_image018

You can see how I did mine with a bit more detail right here, and if you make one of these, you should let me see it! Tag me on twitter or instagram @techni_moments.


PS: I also posted a review of the nineteen books I read in August, which you can also check out if you're interested!