

13 January 2014

11 January 2014

09 January 2014
Dressing Up Bobby pins
Hello! For those of you who know me or who watch my videos, you already know that I really love wearing bows and things like that in my hair, and I often pin the front of my hair back, and then cover the pins with a bow.
Well, lately, I’ve been finding that I’ve been lazy. I can’t be bothered to dig through my bows to find one that matches, or I honestly just forget. But, I still like wearing my hair pinned back, so I decided maybe I should just fancy up some of the hundreds of bobby pins that inevitably end up filling my dresser and bathroom.

Well, lately, I’ve been finding that I’ve been lazy. I can’t be bothered to dig through my bows to find one that matches, or I honestly just forget. But, I still like wearing my hair pinned back, so I decided maybe I should just fancy up some of the hundreds of bobby pins that inevitably end up filling my dresser and bathroom.

08 January 2014

06 January 2014

05 January 2014
2013 Reading Goal Wrap Up & The Best of 2013.
hello friends :) I'm very proud to be able to say that I completed the 2013 book challenge that I set for myself. I had set out to read 120 books in 2013, and I managed to read more than that. I finished off last year with 123 books, an all time record for myself. If you're interested in the books that I read as part of this goal, you can see them either here on my goodreads (let's be friends!) or here as a google doc.
Because I read so many books this year, I decided that I wanted to share my top books of 2013. These aren't all books published in 2013, just ones that I read in 2013. Also, there are two series that, for all intents and purposes, I'm calling singular books. These are in the order which I read them, and all were rated 5/5 stars.
1. The Madness Underneath by Maureen Johnson
2. A Mango Shaped Space by Wendy Mass
3. Eleanor & Park by Rainbow Rowell
4. Love & Other Perishable Items by Laura Buzo
5. The Family Fang by Kevin Wilson
6. The Birthright Trilogy (All of These Things I've Done) by Gabrielle Zevin
7. Two Boys Kissing by David Levithan
8. Fangirl by Rainbow Rowell
9. The Divergent Trilogy by Veronica Roth
10. Mr. Penumbra's 24 Hour Bookstore by Robin Sloan
11. Ready Player One by Ernest Cline
Any of those that are links will take you to the book's individual review, and you can see me chat a bit about those books in a video, here.
As far as next year, I plan to read 100 books! I also hope to review many more of them than I did in 2013. I'd love to review all 100, but I don't know if I can commit to that. I'm going to try though!
I'm also getting stricter with my starring method, so here's how I look at it:
☆ - I did not like this book
☆☆ - This book was not very good.
☆☆☆ - This book was okay/alright/pretty decent
☆☆☆☆ - This book was solidly GOOD.
☆☆☆☆☆ - I LOVED this book.
Let me know what your favorite books of 2013 were!

Because I read so many books this year, I decided that I wanted to share my top books of 2013. These aren't all books published in 2013, just ones that I read in 2013. Also, there are two series that, for all intents and purposes, I'm calling singular books. These are in the order which I read them, and all were rated 5/5 stars.
1. The Madness Underneath by Maureen Johnson
2. A Mango Shaped Space by Wendy Mass
3. Eleanor & Park by Rainbow Rowell
4. Love & Other Perishable Items by Laura Buzo
5. The Family Fang by Kevin Wilson
6. The Birthright Trilogy (All of These Things I've Done) by Gabrielle Zevin
7. Two Boys Kissing by David Levithan
8. Fangirl by Rainbow Rowell
9. The Divergent Trilogy by Veronica Roth
10. Mr. Penumbra's 24 Hour Bookstore by Robin Sloan
11. Ready Player One by Ernest Cline
Any of those that are links will take you to the book's individual review, and you can see me chat a bit about those books in a video, here.
As far as next year, I plan to read 100 books! I also hope to review many more of them than I did in 2013. I'd love to review all 100, but I don't know if I can commit to that. I'm going to try though!
I'm also getting stricter with my starring method, so here's how I look at it:
☆ - I did not like this book
☆☆ - This book was not very good.
☆☆☆ - This book was okay/alright/pretty decent
☆☆☆☆ - This book was solidly GOOD.
☆☆☆☆☆ - I LOVED this book.
Let me know what your favorite books of 2013 were!
PS. I hope to do better with book reviews this year. Whoops.
02 January 2014
positivity & goal achieving diy projects
Happy 2014! I know that whether or not people make new years resolutions is kind of a controversial topic; some people love them, some people hate them. Of course we don't need to wait until the calendar changes to make good and positive changes into our lives, but on the other hand, we all know that thing we do where we're scrolling through tumblr and we're like "okay, at 2:00 I'll start my homework," and then when it's 2:07 we have to wait until 2:30, so it kind of makes sense that we'd also want to start our life changes on a nice round date.
As for me, I don't usually make big resolutions at the new year, but I do tend to set goals for myself to achieve throughout the year. I talked about it in a video here, but these are my goals:
1. Read 100 books
2. Drink more water
3. Take more pictures & learn how to actually use my DSLR
4. Continue to work towards managing my anxiety.
In order to achieve those goals, I have two DIY projects that I did to help direct my motivation & set myself up for positivity.
The first is a Vision Board. Like you can see in the video, my vision board is basically a collage of people I find to be inspirational, quotes and pictures that cheer me up and images of goals I want to achieve. Mine features Demi Lovato, Tina Fey & Amy Pohler, as well as quotes reminding me to chill out, keep calm and to live without regrets. It also has some pictures reminding me I want to read & take pictures so that I don't forget about that. I plan to keep my vision board above my desk, so that I can see it and stay motivated throughout the year.
The second is a Good Things Jar. This is an empty salsa jar that I decorated and plan to fill with slips of paper with "good things" on them as they happen. My goal is that, at the end of the year- or when I have a day where it seems like absolutely nothing is good- I can pull my good things jar out and read through them. I think that this will be a cool tradition to look back on at the end of the year.
Both of these projects will hopefully keep me on the path of positivity this year, which is my biggest goal for 2014. Do you make resolutions or goals at the beginning of the year? What are they?
As for me, I don't usually make big resolutions at the new year, but I do tend to set goals for myself to achieve throughout the year. I talked about it in a video here, but these are my goals:
1. Read 100 books
2. Drink more water
3. Take more pictures & learn how to actually use my DSLR
4. Continue to work towards managing my anxiety.
In order to achieve those goals, I have two DIY projects that I did to help direct my motivation & set myself up for positivity.
The first is a Vision Board. Like you can see in the video, my vision board is basically a collage of people I find to be inspirational, quotes and pictures that cheer me up and images of goals I want to achieve. Mine features Demi Lovato, Tina Fey & Amy Pohler, as well as quotes reminding me to chill out, keep calm and to live without regrets. It also has some pictures reminding me I want to read & take pictures so that I don't forget about that. I plan to keep my vision board above my desk, so that I can see it and stay motivated throughout the year.
The second is a Good Things Jar. This is an empty salsa jar that I decorated and plan to fill with slips of paper with "good things" on them as they happen. My goal is that, at the end of the year- or when I have a day where it seems like absolutely nothing is good- I can pull my good things jar out and read through them. I think that this will be a cool tradition to look back on at the end of the year.
Both of these projects will hopefully keep me on the path of positivity this year, which is my biggest goal for 2014. Do you make resolutions or goals at the beginning of the year? What are they?
20 December 2013
Christmas Ornament Earrings
 Hey guys! I have another Christmas DIY for you this week, but this time it’s to dress you up, not your tree. I’m going to show you how to make some festive earrings using the mini ornaments that you can find everywhere these days, including the One Spot (read: dollar bin) at Target.
 For the project you need two of those ornaments (the dollar ones from Target come in a package of 16), some jump rings and some earring hooks. I’m also going to show you an alternate way to do these if you like your earrings to dangle more, and for those you’ll also need some jewelry chain.

First, let’s do the shorter ones. No additional dangle on this pair, for those of you who like your earrings a bit more modest- or if you’re like me and into the asymmetrical look, this is just the shorter of the set!
I hope you’re ready for how unbelievably easy this is:

Step one: Open up your jump ring, using two pairs of pliers.

Step two: put both the ornament and the hook on the jump ring.

Step three: close the jump ring back up.
Yes, that’s really all there is to it. If you like your earrings short, go ahead and do that same thing again, but if you want a longer one, let’s keep going.

For the longer one , it’s almost exactly the same, with the addition of some jewelry chain.

Step one: cut the chain to the length you want it to be.

Step two: open up your first jump ring.

Step three: put one end of the chain, and the ornament on that jump ring, and close it.

Step four: put the other end of the chain and the earring hook on a second jump ring. Close that one, too.
Yup. That’s really how easy it is!
Like I said, I’m into the asymmetrical look so I’m wearing one of each, but you can go ahead and do whichever you prefer! If you do these, I’d love to see them- send them to me on twitter or instagram, I’m @techni_moments!
Stay crafty,
13 December 2013
Hot Glue Snowflake Ornaments
Hey guys! I hope that it’s not too early for Christmas for you guys. I’ve been in holiday mode since Halloween ended, but I figure it’s December now, I can start sharing the holiday love! This week I’m going to show you how to do a really super easy ornament or decoration using nothing but hot glue and some glitter!
 There’s no sewing or really much else required for this, so it’s pretty quick, too. You can definitely do this with older children, but use judgment- hot glue gets hot.When you’re finished this project, you’ll have a glittery, icy snowflake that’s perfect for hanging on your tree, putting in a window or anywhere else that needs some winter love.
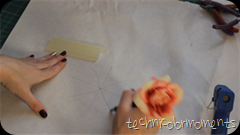 All you need for this is hot glue & glitter, but I’d also recommend some wax paper and then whatever you’re going to hang it with- wire, ribbon, etc. You’re going to need a few hot glue sticks. Mine took about 4. As for the wax paper, it’ll make pulling the hot glue up much easier than regular paper would.
Lay out your wax paper, and draw an asterisk the size you want your snowflake to be.
You could also put a printed out snowflake under the paper and trace it, but I’m going to freehand mine- I just wanted a bit of a guide.
 Start by tracing the asterisk with the glue. You want it to be pretty thick, so don’t go too light on it. Also, don’t worry about getting those pesky little strings of glue just now, you can deal with those once the whole thing is done. There will be a ton of them by the end.
 Once the basic shape is done, add in details. I put circles at the end of each line and also put some arrowheads on the lines to make it look a little more snowflakey, but you can look at pictures and do pretty much whatever you want here.
Then, you need to let it dry. Hot glue dries pretty quickly, but still let the whole thing sit for a couple of minutes before doing the second layer.
You don’t want to be remelting the same not-quite-cooled glue because then it won’t get any thicker.
 Once it’s dry, add a second layer to everything you’ve done. Determine where the top is going to be, and make sure you’ve left a loop or something to run the wire or ribbon through. I just didn’t fill in one of the circles on the top of mine, but depending on how you do yours you may need to get a bit creative with it.
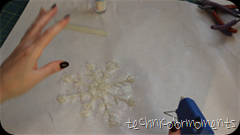 Before it has a chance to dry completely, cover it in glitter. Just cover it. Glitter. Everywhere. Then, do a third and final layer of glue. Let that final layer dry for at least 5-10 minutes before you do anything with it.
 After a sufficient amount of time has passed, go on and peel it off of the paper. If you used wax paper, it shouldn’t stick too badly, but either way, pick off any paper that is stuck to it, and also cut off all of those little hot glue strands that always seem to be everywhere.
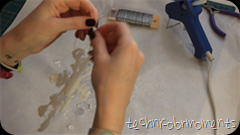 Add some wire or ribbon to hang with, and you’re done! It’s ready to be hung on your tree, or wherever else you’re decorating this holiday season. And the best part is, it’s not even really a Christmas decoration so it can stay up all winter!
If you do one of these, I’d love to see it- send me a pic on twitter or instagram, @techni_moments. Good luck!
Stay crafty!
 There’s no sewing or really much else required for this, so it’s pretty quick, too. You can definitely do this with older children, but use judgment- hot glue gets hot.When you’re finished this project, you’ll have a glittery, icy snowflake that’s perfect for hanging on your tree, putting in a window or anywhere else that needs some winter love.
Lay out your wax paper, and draw an asterisk the size you want your snowflake to be.
You could also put a printed out snowflake under the paper and trace it, but I’m going to freehand mine- I just wanted a bit of a guide.
 Start by tracing the asterisk with the glue. You want it to be pretty thick, so don’t go too light on it. Also, don’t worry about getting those pesky little strings of glue just now, you can deal with those once the whole thing is done. There will be a ton of them by the end.
  Once the basic shape is done, add in details. I put circles at the end of each line and also put some arrowheads on the lines to make it look a little more snowflakey, but you can look at pictures and do pretty much whatever you want here.
 Then, you need to let it dry. Hot glue dries pretty quickly, but still let the whole thing sit for a couple of minutes before doing the second layer.
You don’t want to be remelting the same not-quite-cooled glue because then it won’t get any thicker.
 Once it’s dry, add a second layer to everything you’ve done. Determine where the top is going to be, and make sure you’ve left a loop or something to run the wire or ribbon through. I just didn’t fill in one of the circles on the top of mine, but depending on how you do yours you may need to get a bit creative with it.
 After a sufficient amount of time has passed, go on and peel it off of the paper. If you used wax paper, it shouldn’t stick too badly, but either way, pick off any paper that is stuck to it, and also cut off all of those little hot glue strands that always seem to be everywhere.
 Add some wire or ribbon to hang with, and you’re done! It’s ready to be hung on your tree, or wherever else you’re decorating this holiday season. And the best part is, it’s not even really a Christmas decoration so it can stay up all winter!
 If you do one of these, I’d love to see it- send me a pic on twitter or instagram, @techni_moments. Good luck!
Stay crafty!
06 December 2013
Influenster #VioletVoxBox
Hey guys! It’s been a really long time since I’ve done a post like this- I don’t think I’ve gotten a box from Influenster since I was still living in Charleston. I was super excited to get another one.
 If you want to see me opening it, you can check out the video on my youtube channel, here! Otherwise, here’s what’s in it:

Subscribe to:
Posts (Atom)